Table of Contents
ToggleAll About Push-ups
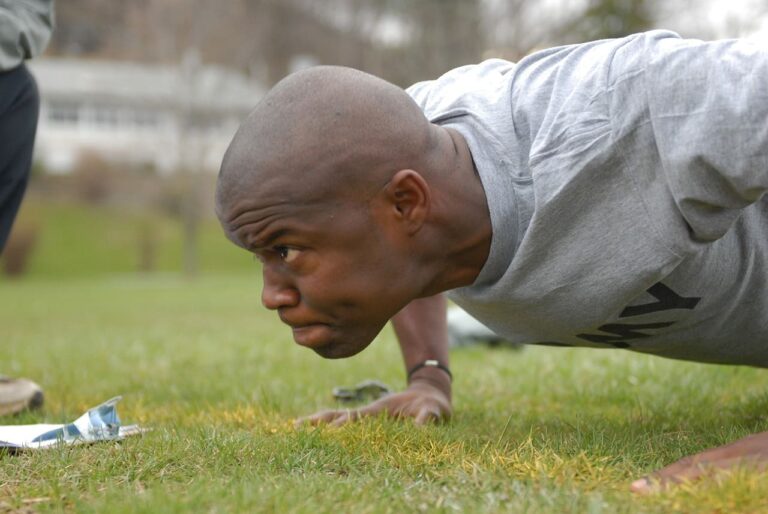
Push-ups are one of the few exercises which do wonders to the body and all you need is a ground/floor, gravity and your own body weight to start. I am sure we all have that! This blog will cover the benefits of push-ups, all your doubts related to it and give a complete guide to the beginner trying to learn push-ups or stuck in any of the progressions.
Benefits of Push-ups
There is a long list of benefits of doing push-ups and below mentioned points are just a few of them:
1) Strengthen the upper body
Push-ups are proven to increase the upper body strength as it is a compound movement, which means it activates more than one muscle group and few variations of push-ups are proven to be as effective as bench press, about which you can discover in this blog Variations of Push-ups.
2) Enhances Athleticism
Push-ups and its different variations have been a part of the training of many ancient Roman, Indian and other country gladiators and emperors and it is still used in the workout schedule of great athletes like wrestlers, footballers, etc., and considered as a fitness test in many defense forces selection programs. It helps in increasing force production, awareness and agility of the body.
3) Adds muscle to the upper body
Push-ups are very challenging to the body of an individual which provides a great stimulus to it and hence helps in adding more muscle to the body frame. Also it has numerous variations through which it is easy to keep the tension on the muscle highly and effectively.
4) Cardiovascular Health
Push-ups require a lot of strength to perform(varies according to its variation) which increases the blood circulation in the body and hence increases your heart rate. Though not enough studies have been conducted to establish explicitly that it ensures heart health.
5) Weight Loss
Adding a few push-ups in your daily lifestyle or workout regime can help you burn extra calories and add noticeable muscle and also helps in body recomposition.
Correct Technique of standard/normal push-up
It is extremely important to perform any exercise in the correct form so that you can have the maximum benefit, less chances of injuries and proper results out of it. So, let’s understand the mechanism to do the push-ups correctly in only 3 steps:
STEP-1:- Lie down on the floor and place your hands beside your body so that your hands are adjacent to the lower line of your chest. To check whether you placed your hands correctly or not, at the top position of push-up your hands/wrists should be beneath your shoulders.
STEP-2:- Now remember the hand placement and get in a hand plank position [a type of plank which is done on hands and not on elbows, hands fully locked straight, straighten your legs and keep them together, engage your abdominal area and glutes by squeezing your butt and pull your shoulder blades/scapula down (Scapula Depression) and spread apart (Scapula Protraction) so that your shoulders don’t touch your ears, keeping your body in a straight line.]
STEP-3:- Now slowly start moving down by gradually bending your elbows so that your body touches the ground. Once you reach the bottom position, push yourself back up again.
Simple, isn’t it! But you still need to focus on some mistakes which you may do in your journey to learn and improve push-ups and some pro tips as well which will help you to increase the effectiveness and ease in the execution of it.
5 Most Common Mistakes
(1) Body Alignment
People often tend to sag their hips down or lift too high which makes the push-ups easier and less effective to do because you are no longer stabilising your body and also decreasing the ROM(Range of Motion). Also bending the elbows at the top position, APT(Anterior Pelvic Tilt) which is arching the lower back, not locking out the knees completely throughout the movement or not keeping the neck at a neutral position is a way of breaking the body’s straight alignment.
[Quick Fix-Make sure you are doing the PPT(Posterior Pelvic Tilt) or contracting/squeezing your glutes throughout the movement, so that your hips stay at a perfect position.]
(2) Scapula Movement
People performing push-ups often just bend the elbows in and out and often neglect their scapula/shoulder blade movement which minimises their gains.
[Quick Fix:-Always be aware that as you push up, your scapula should go away(protract) and as you go down they should come closer(retract) but do not do spinal flexion at the top position of the push-up which means do not overly round your spine.]
(3) Shoulder Position
Shrugging your shoulders, which means keeping the shoulders held up so that it touches the ears shifts the focus from the targeted muscles and reduces the effectiveness of the exercise.
[Quick Fix:-Always keep your shoulder pushing downwards throughout the movement and simply it will prevent you from shrugging.]
(4) Flaring Elbows
Often the elbows flare outwards while doing push-ups which means they are going too sideways which increases the risk of injury and wrist pain.
[Quick Fix:-At the bottom position, make sure your both elbows and head are forming a triangle and the wrist is perpendicular to the elbow-which means right above them, unless you are doing a different variation of push-ups. To be precise, your elbows should be at roughly 45-60 degrees.]
(5) Partial ROM
People who run for fast results often tend to cut their ROM(Range of Motion) and do partial reps/repetitions which reduces the effectiveness of the exercises significantly.
[Quick Fix:-Always make your first rep look like the last and last one look like first, which means do not compromise the quality at any rep. Always go completely down and come completely up so that your elbows are fully locked out/straight at the top. It’s 10 times better to do 5 perfect clean push-ups rather than doing 10 floppy push-ups.]
Pro Tips

These are a few tips which can expedite your journey to do your first push-up and continue to add on more over time.
1. Think of pushing the ground downwards rather than thinking to push yourself back upwards. This small alteration in your mindset will automatically help in generating more force.
2. Start shifting your body a bit forward through moving your ankle slightly as you go down gradually rather than just pushing up and down in a straight horizontal line.
This way also you are pushing in a straight line but in a different alignment which ensures you are not flaring your elbows, smooth scapula movement and hitting your chest effectively. At the bottom position of the push-up your hands will be adjacent to your lower line of the chest if you will adopt this technique correctly.
Progressions of Push-ups: Beginner Guide to Push-ups
Through the following 4 steps you will easily achieve your first push-up and be sure that you do not rush the process and correctly implement them. Rushing any of the stages will hamper your growth and you have to start all over again. So, be patient, have faith and respect the journey.
Points to Remember
(1) Keep in mind the correct technique of doing push-ups mentioned in the blog above and always do all the steps while having the technique in place.
(2) Always start with a progression in which you can at least do 5 reps in each set for around 3-5 sets.
(3) When you are able to do any progression for 12-20 reps or at most 30 reps effortlessly, it is a clear indication to move on to another progression.
(4) Please do consider a nice and short warm up before your actual training so as to avoid any sort of injury, wrist pain ,etc.
STEP-1:-(Wall Push-ups)
This is for complete beginners who do not have the basic strength of pushing their own body weight and hence we are firstly starting from building the foundational strength and getting used to the movement pattern.
Don’t be ashamed that you do not have enough strength now, be confident that at least you are eager and trying to build it. You just have to do the push-ups by keeping your hands on the wall and incorporating the technique discussed above.
STEP-2:-(Knee Push-ups)
This time also you have to do push-ups with a slight variation which is to do them on your knees rather than on your toes. In this variation people often try to cheat with the body alignment by doing APT(Anterior Pelvic Tilt) or arching their lower back so keep in mind the technique. OR
(Incline Push-ups) If you are having problems with the body alignment in knee push-ups or you are looking for an alternative, then you can go with incline push-ups. You just have to place your hands at an inclined surface whose height is your hip level height. And as you progress you can lower down the height gradually ultimately coming parallel to the ground level, in a push-up position.
STEP-3:-(Negative/Eccentric Push-ups)
If you have reached this progression which means you are very close to your goal. You have to be in the exact position of doing a push-up but you only have to do the negative/eccentric phase or you just have to come down slowly from the top position of the push-up to the bottom position.
Remember, the key factor to perform this is the tempo/speed of doing it. Make sure you are taking 3-5 seconds per rep to go down.
STEP-4:-(Push-ups)
Yes, you have finally reached your goal of doing your first push-up and now you can add on more and more reps as you get better in this movement. By this time, you will surely be able to do a handful of push-ups.
How much time does it take to learn the pushup?
No one can answer this how long it will take for any individual to do his/her first push-up due to various factors involved. The only way to know the time period is by getting involved in the process and start doing it. But still on average, it takes somewhere around a few weeks to even months.
All you have to keep in mind, if you follow the process through correct technique, the right amount of effort, patience, consistency and not comparing your journey with anyone else’s journey, your push-up numbers will improve over time.
How to structure the workout program for push-ups?
Train 2-3 times a week. Initially as a beginner you should pick up any progression according to your comfort level(Points described in Points to be Remember) and start with-
3-5 sets of 5-8 reps in each set and slowly increasing your reps as you get stronger in the movement. For e.g:
(i) 5 sets of 5 reps(Total 25 reps)
(ii) 3 sets of 8 reps(Total 24 reps)
(iii) 3 sets of 10 or more reps as you improve.(Total 30 or more reps)
Through this way you can start and keep pushing yourself forward while maintaining the volume and intensity of the workout as well as not overly fatiguing yourself.
Takeaway
Push-ups are one of the great body weight exercises which can be easily in everyone’s workout routine and help you to add strength, muscle and many more benefits to your body. Hope this blog helped you and if you want to continue and improve your push-ups journey, you can check this blog out Variations of Push-ups.


Thanks bro i have been doing pushups for more than a month now and this information is really going to help me a lot
Hope it helps you!